Let’s talk about No-Till Gardening
This last year I was told, rather bluntly, “Forget everything you know about gardening and start over” and I haven’t forgotten those words.
It wasn’t only that those words sent a spike of curiosity up my spine, but the reasoning behind them.
I was learning about a new method of gardening: the no-till method.
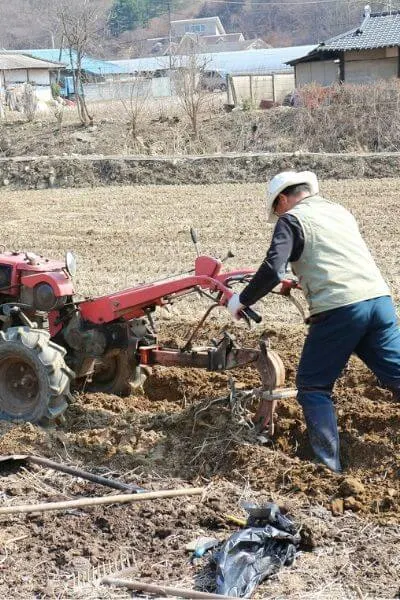
Now, my husband jumped right in on the idea, “No-tilling? OK! You don’t have to convince me!” His job each spring was to till my garden and my job was to…nag him…until it was done. 😉 There is only a limited amount of time in Montana (zone 3) before summer is in full heat and snow is just around the corner, you know? So if tilling was in the plans, it had to be done…without delay.
Before I continue, I must stop to encourage you to read this article: Why Does My Garden Have Weeds? Here’s Why and How to Fix it. It’s the missing link to this article and to truly understand what is happening in your soil, you need to understand why there are weeds in the first place. But carry on with the article below…and then come back 😉
Our exactly 90 days, 7 hours, 5 minutes, and 32 seconds of summer makes for a fast and furious few months of planting, tending, harvesting, canning…and falling in a heap because we have had to check off a complete summer to-do list that most people have the luxury of finishing in 6+ months.
And my garden? Well…The forgotten beanstalks, the stubs of corn, the wilted tomato plants all accumulate a pile of snow through the winter months in the exact place they were planted because there just wasn’t enough energy to get it all done and cleaned up in the fall.
Absolute must read books:
So, boy was it music to my ears when I heard, “That’s OK. In fact, it’s great because the roots are adding organic matter to the soil and are also helping break it up and will make great mulch when you cut off their tops in the spring.”
It didn’t take much convincing to adopt this new method, I mean, no tilling and not feeling guilty at the end of the garden year for not getting it cleaned up? I’m in!
But I’m here to tell you there’s more.
5 more reasons you should begin to NOT till your gardening.
But first, why is there a problem with tilling your garden?
- When the soil is turned, it leads to a 90% loss of the decomposing crop from the previous year. Your garden needs that decomposing organic matter to keep it healthy!
- The soil is exposed to all the elements. Wind and rain are the most devastating, causing the soil to be blown or washed away.
- Although there is one benefit to tilling: disrupting the life cycle of the weed, it is very labor-intensive because most plots will need to be tilled several times before planting begins.
- Tilling also creates a hardpan, just below the depth of the tiller, that you don’t want under your garden.
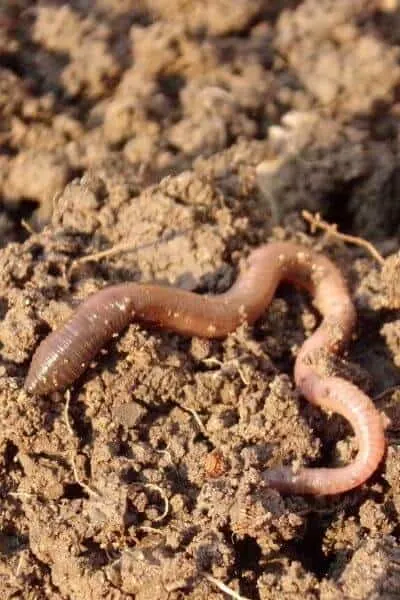
- And the entire underground environment for all the bugs and fungi is disrupted…you want to keep your worms happy, right? Then you better stop tilling.
Does that convince you to begin to stop tilling your garden?
Learn about how to control slugs naturally here!
Before we delve into the 5 reasons you should stop tilling your garden, what exactly is “no-till gardening”?
Your goals with this method of gardening are as follows:
Disturb your garden soil as little as possible.
This is how the network of bugs, worms, and fungi can really begin to make your soil healthy.
Keep the soil completely covered with mulch.
Not one speck of dirt should be seen if you were to fly over your garden plot in an airplane. (That would be fun, wouldn’t it?) The key to mulching is using lots of mulch. It needs to be thick enough that the weed seeds cannot germinate and grow through the barrier.
You may need as much as 8-10 inches of straw, leaves, or grass. Always be aware of where your mulch is coming from and how it was treated. If you layer your garden with chemical-laden straw or grass, you may end up hurting your soil more than helping.
Using cardboard or newspaper in a no-till garden as a base layer will allow you to use less organic matter on top of the cardboard.
This mulching article will give you all the best tips and techniques
You can also use cover crops for a no-till garden as a great way to cover your soil.
Do not walk on the planting areas.
Make paths to walk on in the garden area and use a board to stand or kneel on as you are planting. This will keep the soil from becoming compacted.
Implement companion planting by planting in communities.
In each gardening section, “stack” your plants by planting the tallest plants in the back and stair-step down to the smallest plant.
At the end of the garden season, the roots are left in the ground and the leaves and stems are used as more mulch.
Did you know? As the health of your soil increases, the life in your soil increases. The more life there is (which is in the form of bacteria and fungi), the more FOOD they need. This means you will need more mulch in your garden to feed the microorganisms.
Your goal is to keep adding more and more “food” to your garden for all the living life to be able to break down and consume. And the more life and healthy your garden soil have, the more food it will need to consume. So keep adding all the leaves, mulch, and food that you can each year!
Garden mulch is used to help squelch weeds, retain moisture, AND feed the microorganisms in the soil. Never forget about those little invisible guys in your soil!
And above all else, always keep this in mind: What is nature doing?
What is happening naturally in your area? Use those practices in your gardening. We can learn a lot by being observant and nature truly does know best and we will benefit greatly by trying to do what she does even in our gardens.
I bet you are just itching to know more. What else does the no-till gardening method do for your soil and for you? I’m glad you asked:
• Soil erosion becomes virtually non-existent. The roots and mulch are holding it all together.
• Less watering is needed. The mulch covering the soil protects and prevents moisture from leaving, and by keeping it evenly moist, you water less because there are less evaporation and runoff.
(Check out how to know when to water your garden: The Finger Test)
• The fun guys are extra happy. Organisms like the mycorrhizal fungi love the no-till method because it allows for great biodiversity among the underground brotherhood.
In plain English: when you look at your dirt under a microscope, you want to see a wide variety of different organisms wriggling around, and this leave-the-soil-in-tact method promotes that.
• You will find that there are fewer weeds. Tilled, bare soil, is an open invitation for all weeds to come and make a new home. It is the perfect environment for them to thrive and it will be a continual battle between you and the dandelion.
Did you know that when you pull a weed you can usually never get the entire root and it happily grows what seems to be 16 more plants in its wake? And when you till, every weed root is cut up into tiny pieces and spread all over the garden, happily waiting to grow one thousand more weeds. Dandelions are also an indication that your soil is compacted.
When your garden is given all the organic matter it needs and the fungi and worms are happily doing their jobs, the weeds move on to a more suitable environment. Weeds do not like the healthy soil that your veggies will thrive in.
• You benefit from less labor. 🙂 Oh, boy, I really like this one. I mean, I care about the fungi and all, but when the summer is cram-packed-full of summer, who has time to pull weeds, continually water, and chase the nasty bugs away? No one. This, my friends, is the icing on the cake.
After writing this all up, I’ve convinced myself again why this no-till method is the absolute best for my garden.
Are you convinced as well?
It may be hard to hear, “Forget everything you know about gardening, and start over” but I’m telling you, you will be glad you did. And in those warm summer months, when the window is open and the breeze is slowly breathing the curtains back and forth…listen closely, you just may hear the delighted, “Squeee!” of all the happy worms and fungi making your garden the best place to be and the very best it can be!
If you would like more information and would like to watch a few cool videos, sit a spell and enjoy:
If you are on a journey to self-sufficiency, you may be interested in our free resource page for homesteaders. It is password protected and updated weekly. So take a moment and sign up below. You will receive an email shortly and will be able to download and print all the helpful resources.
Seriously, our free resource page is worth looking into. It has a great selection of tips and checklists that have helped me out greatly. This page is password protected and is updated almost weekly! How much better can it get?? 😉 Sign up below! Happy learning!
Get access to 50+ resources to help you gain confidence, save time, stay organized, and restore hope. Your password-protected page will be updated on an almost weekly basis and weekly emails from A Life of Heritage will keep you in the know. 🙂 We want to bless YOU with this information!
All you have to do is:
- Sign up below
- Find your confirmation email (in inbox or junk/spam folder) and confirm subscription
- The Welcome email will hold all the details and password for logging in to your resource page
- Add [email protected] to your contacts to ensure that you receive future emails and updates to our resource page
FREE RESOURCE PAGE

Patti Armbrister
Sunday 12th of March 2017
Great Job Delci and perfect subject, less work, better food, and building soil for the future.
Rhonda
Friday 10th of March 2017
At what stage do you add your seeds/plants? You've got cardboard and mulch then seeds??
Delci
Saturday 11th of March 2017
When it is time to plant, you just pull the mulch aside and plant your seeds or seedlings :) Each year you can add mulch to the previous year's mulch and around the plants as they grow bigger.
Ashley
Thursday 9th of March 2017
Love this. Think more people need to know about this and Korean natural farming! Save money n work n reap major benifits! ❤️
Delci
Thursday 9th of March 2017
Yes! Exactly! I'll have to look up Korean natural farming! Thanks for the input!
Heidi Villegas
Wednesday 8th of March 2017
I have never tilled our garden---just gotten rows going. We have rocky, sandy soil, so for the past three years, I've been adding fine organic wood mulch chips in the early spring. It's broken down wonderfully, and now the soil is rich and dark. I grew up learning to til (because my dad always did), but I never have because our soil is SO hard! But no more! So I love the mulching method. One question I have: I didn't put that much mulch on (only about 2 inches). Is using so many inches thick necessary? Of course, we didn't use straw, though.
Delci
Wednesday 8th of March 2017
The idea is to have enough that it really squelches the weeds. Our grass (and weeds) grow to 4 feet tall in our location so it takes a lot to thwart them. That is so cool that your ground has made such a great transition! It proves that when we give it what it needs, it thrives and we benefit in so many ways!
Naomi Morrison
Friday 3rd of March 2017
One thing to watch out for...when you use straw, be very careful about the source! If it was grown with systemic weed killers, and/or fed to cattle/horses and you are using the manure, the weed killers can remain active for years, and distort and ruin everything you plant in it. I had this problem 3 years ago using straw mulch from chicken bedding on my garden. BE VERY CAREFUL ON YOUR STRAW SOURCE!
Delci
Friday 3rd of March 2017
That is a very good point! I've heard of others who have had the same situation as you. We need to eliminate weed killers and pesticides from everything we use! I'll add that to the post, thank you for the insight! :)